코틀린은 원래 범용 프로그래밍 언어이고 자바와 완벽히 호환됩니다.
Kotlin is essentially a general-purpose programming language and is fully compatible with Java.
제가 소개하고자 하는것은 안드로이드 앱 개발에 대한 내용입니다.
What I want to introduce is about Android app development.
안드로이드 앱개발은 자바로 개발했었지만 지금은 구글에서 주요 개발 언어로 코틀린을 권장합니다
Android apps used to be developed in Java, but now Google recommends Kotlin as the main development language.
저도 코틀린은 공부 중입니다.
I’m still studying Kotlin
이번 시간에는 간단한 예제와 소개만 해드립니다.
This time, I will only provide simple examples and introductions.
1.안드로이드 스튜디오(Android Studio)
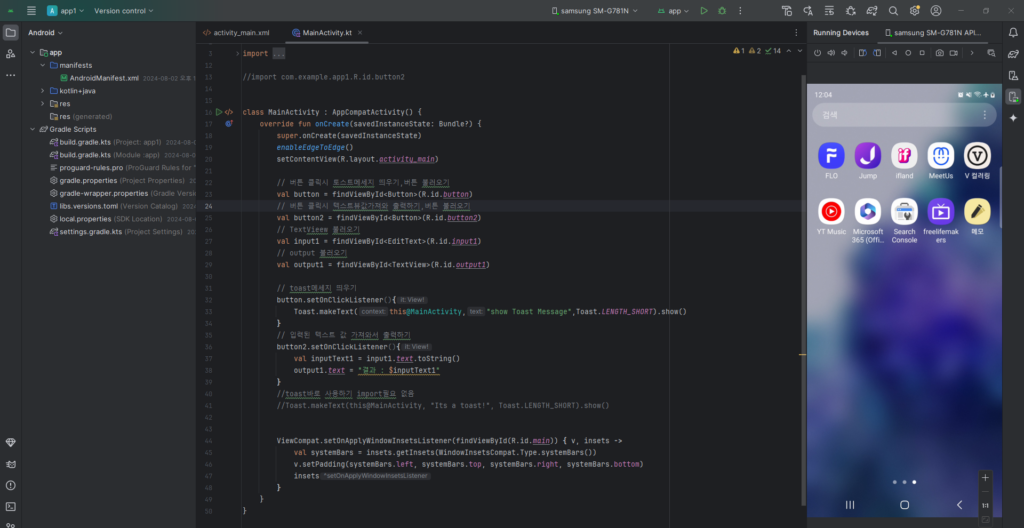
– 아래는 저의 pc에 설치된 안드로이트 스튜디오의 모습입니다.
Below is a picture of Android Stuido installed on my PC.
– 가운데 화면은 앱디자인 화면(active_main.xml)이고 우측 아이콘있는 화면은 저의 모바일폰 화면입니다.
The middle screen is the app design screen, and the screen with the icon on the right is my mobile phone screen.
– Name Text에 입력된 값을 버튼 누르면 결과(빨간색 글자) 부분에 출력하는 예제 입니다.
This is an example of printing the value entered in the Name Text in the results (red text) section when you press the button.
-그리고 다른 버튼을 누르면 토스트 메세지를 출력합니다.
And when you press another button, it outputs a toast message.

-아래는 코틀린 코드 입력하는 MainActivity.kt파일 내용 입니다.
Below is the contents of the MainActivity.kt file where you enter the Cotlin code.
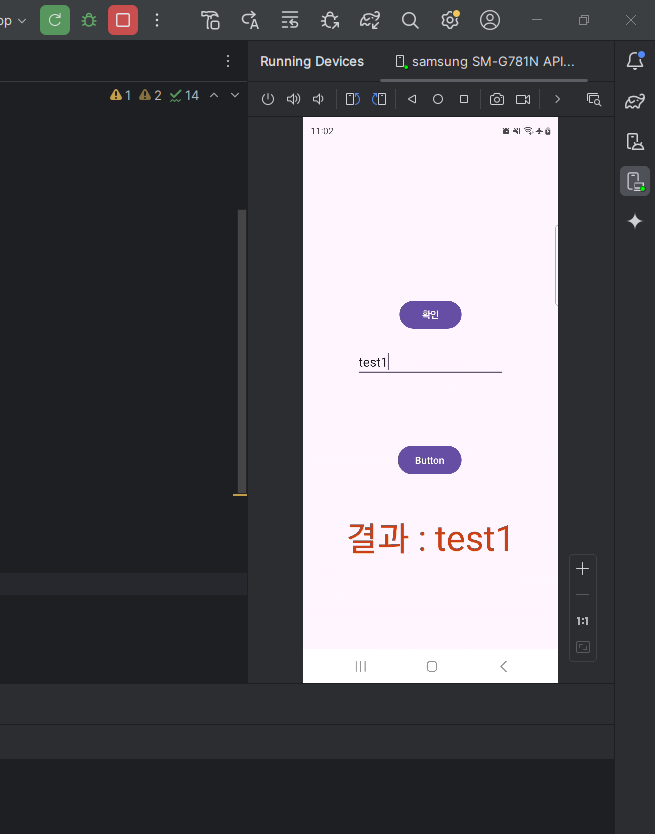
-예제 프로그램 실행하고 test1을 입력한뒤 버튼을 누른 결과 입니다.
This is the result of executing the example program, entering test1, and pressing the button.
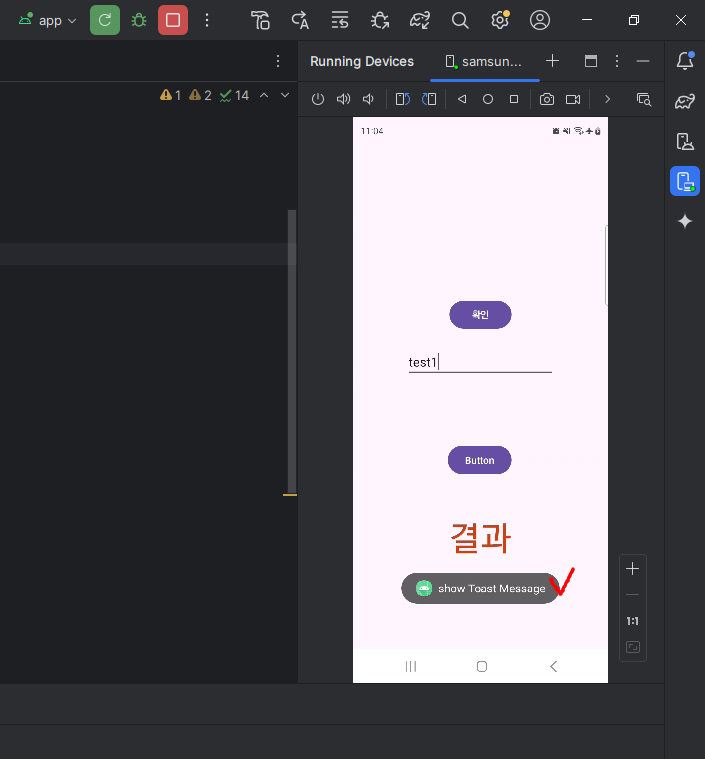
-아래는 맨 위의 버튼을 누른 결과 입니다.(토스트 메세지 실행)
Below is the result of pressing the top button (execute toast message)
2.kotlin-android-extension
– build.gradle.kt파일에서 kotlin-android-extension은 더 이상 사용할 수 없습니다.
In the build.grade.kt file, kotlin-android-extension is no longer available.
-그래서 그냥 버튼,입력박스,텍스트뷰를 수동으로 불러 오기했습니다.
So I just manually imported buttons, input box(EditText), and TextView.
        // 버튼 불러오기
        // Import button
        val button = findViewById<Button>(R.id.button)

        // 버튼2 불러오기

        // Import button
        val button2 = findViewById<Button>(R.id.button2)

        // EditText 불러오기
        // import EditText
        val input1 = findViewById<EditText>(R.id.input1)

        // TextView 불러오기
        // import TextView
        val output1 = findViewById<TextView>(R.id.output1)
3.전체 코드(Full Code)
package com.example.app1

import android.os.Bundle
import android.widget.Button
import android.widget.EditText
import android.widget.TextView
import android.widget.Toast
import androidx.activity.enableEdgeToEdge
import androidx.appcompat.app.AppCompatActivity
import androidx.core.view.ViewCompat
import androidx.core.view.WindowInsetsCompat

//import com.example.app1.R.id.button2


class MainActivity : AppCompatActivity() {
    override fun onCreate(savedInstanceState: Bundle?) {
        super.onCreate(savedInstanceState)
        enableEdgeToEdge()
        setContentView(R.layout.activity_main)

        // 버튼 불러오기
        // Import button
        val button = findViewById<Button>(R.id.button)

        // 버튼2 불러오기

        // Import button
        val button2 = findViewById<Button>(R.id.button2)

        // EditText 불러오기
        // import EditText
        val input1 = findViewById<EditText>(R.id.input1)

        // TextView 불러오기
        // import TextView
        val output1 = findViewById<TextView>(R.id.output1)

        // toast메세지 띄우기
        // Running Toast Message
        button.setOnClickListener(){
            Toast.makeText(this@MainActivity,"show Toast Message",Toast.LENGTH_SHORT).show()
        }
        // 입력된 텍스트 값 가져와서 출력하기
        // Get input text values and print them out
        button2.setOnClickListener(){
            val inputText1 = input1.text.toString()
            output1.text = "결과 : $inputText1"
        }
        //toast바로 사용하기
        //Toast.makeText(this@MainActivity, "Its a toast!", Toast.LENGTH_SHORT).show()


        ViewCompat.setOnApplyWindowInsetsListener(findViewById(R.id.main)) { v, insets ->
            val systemBars = insets.getInsets(WindowInsetsCompat.Type.systemBars())
            v.setPadding(systemBars.left, systemBars.top, systemBars.right, systemBars.bottom)
            insets
        }
    }
}